Mid Drop Fade
vs Mid Fade
One line curves behind the ear. One doesn't. That's the entire difference, and it's almost invisible from the front, which is how people end up with the wrong one.
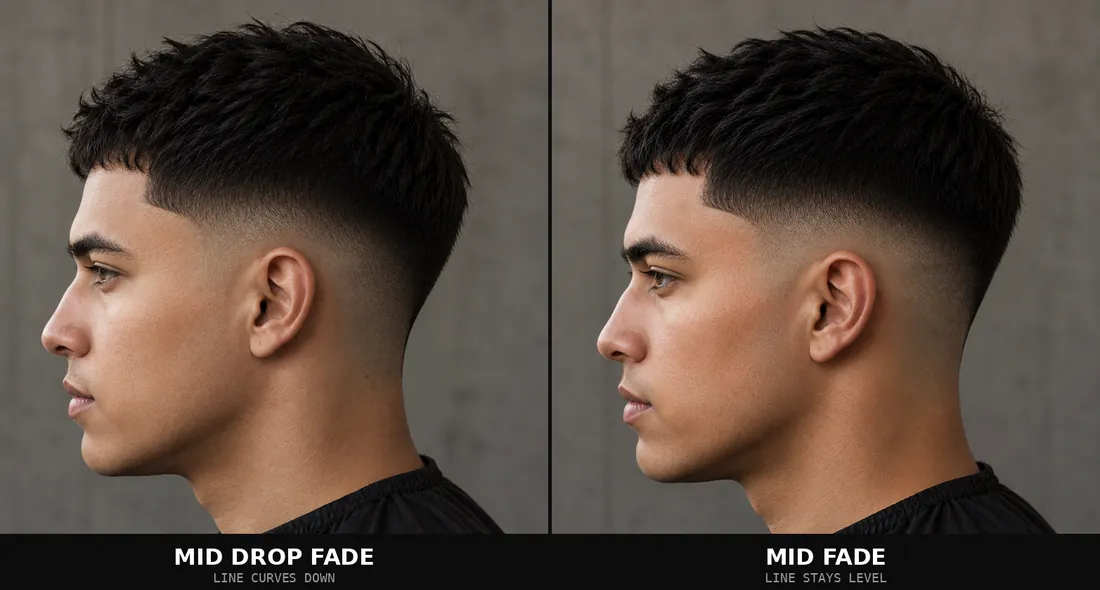
Mid drop fade vs mid fade: the difference
A mid fade holds one height the whole way round (temple, sides, back, all level, like a line drawn parallel to the floor). A mid drop fade starts at the same place and then curves downward as it passes the ear, finishing lower at the nape.
Both begin at mid-temple. Neither is shorter or longer at the front. The only thing that changes is whether the line stays flat or arcs down at the back.
The practical effect: because the line sits lower at the back, a drop fade leaves more length behind the ears than a mid fade at the same front height. That builds in a bit of fullness at the nape and gives a flowing, curved shape rather than a hard horizontal band.
Two paths around the same head
Drawn as lines it's obvious. On an actual head it's far more subtle, which is the whole reason this comparison confuses people.
Mid drop fade vs mid fade in real life
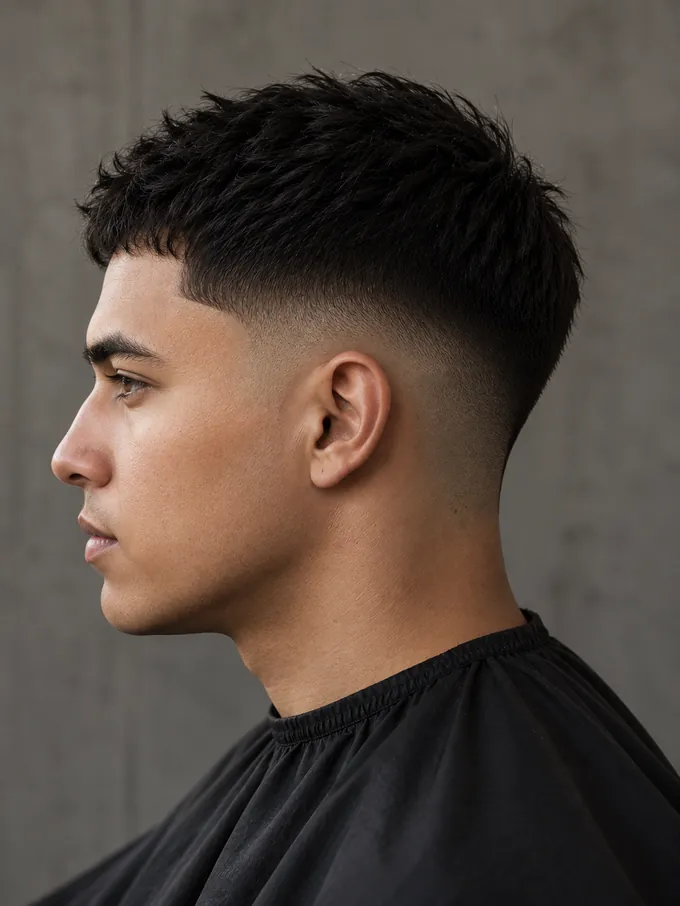
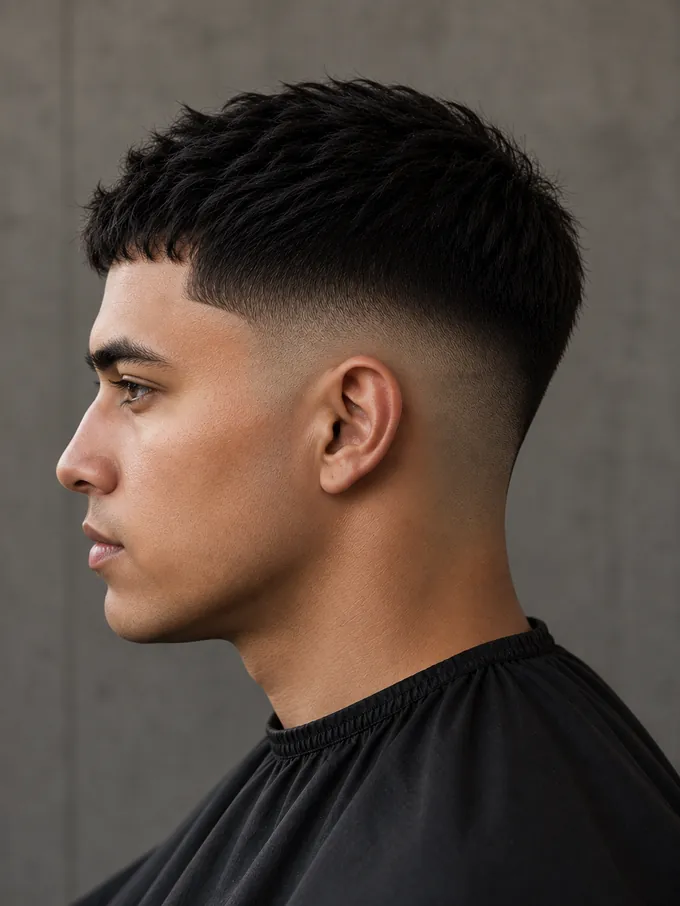
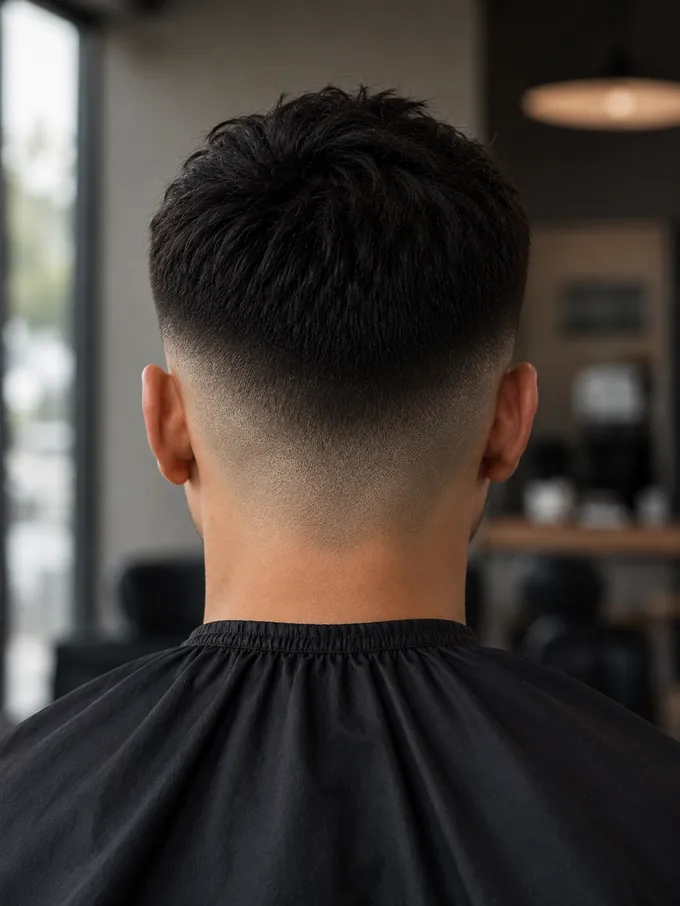
The difference is subtle here, and that's the point. From the front the two cuts are nearly identical. In profile you have to look for it. The drop only becomes obvious from behind, where it forms a shallow U across the nape instead of a straight band. That's why people sometimes ask for one and end up with the other, and why a side-profile reference photo matters more on this cut than almost any other.
Three settings, not one choice
Fade terminology gets confusing because people treat every name as a separate haircut. It's cleaner to think of a fade as three independent settings, and "drop" is only one of them:
1. Shape: level or drop. Does the line stay flat, or curve down behind the ear? That's what this page is about.
2. Height: low, mid, or high. Where does the fade begin on the side of your head? Covered in mid vs low drop.
3. Closeness: guard length or skin. How short does it go at the bottom? Covered in mid drop vs skin fade.
These combine freely. A "low drop skin fade" is a drop shape, at low height, taken to skin, three settings, not one exotic cut. Once you see it this way, every fade name on a barbershop menu decodes itself, and asking for what you want gets much easier.
Mid drop fade vs mid fade compared
| Attribute | Mid Drop Fade | Mid Fade |
|---|---|---|
| Line path | Curves down behind the ear to the nape | Level all the way around |
| Starting height | Mid-temple | Mid-temple, identical |
| Hair kept at the back | More, the line sits lower so length carries down | Less, cut short at a consistent height all the way round |
| Visible from the front | Barely distinguishable from a mid fade | Barely distinguishable from a drop |
| Visible from behind | Clearly, a shallow U at the nape | A straight horizontal band |
| Reads as | Modern, flowing, sculpted | Classic, uniform, understated |
| Head shape effect | Leaves a little more fullness at the back, softens a flatter head shape | Keeps things closely cut and even, no built-in shaping effect |
| Barber skill needed | Higher, the arc must match on both sides | Lower, a level line is easier to keep even |
| Rebook every | 2 to 3 weeks | 2 to 3 weeks, marginally more forgiving |
| Best with | Textured crops, curls, quiffs, tops with visual weight | Anything, including very short tops |
Where the drop actually shows
When the drop isn't worth asking for
- A buzz cut or close crop leaves nothing for the curve to frame. The drop and a level fade look nearly the same on very short tops, so you're paying for precision you can't see.
- Thinning or flat on top, the drop can work against you. It's a strong shape, and with a weak top it takes over: sides looking worked-on, top not holding its end up, and the whole cut reading as unbalanced.
- Ask first if your barber mainly cuts level fades. The arc needs deliberate technique and muscle memory. A barber used to horizontal lines can do it, but the first attempt may be uneven. Ask to see examples.
- A curve that grows out unevenly looks worse than a straight line that does. Asymmetry is more obvious on an arc, so skip it if you can't commit to the schedule.
- Only ever see yourself from the front? This is a cut that pays off in profile and from behind. If that doesn't matter to you, a mid fade gets you most of the look for less fuss.
Head shape and hair type
If the back of your head is flatter, the drop helps. Because the line sits lower there, it leaves more length at the crown and nape, building in shape where a level mid fade would leave it flat. If your head is already full or round at the back, a mid fade is the safer pick since it won't add bulk the way a drop can.
Got some volume on top, texture, curls, a quiff? That's exactly what the drop is built to frame. Curly hair and quiffs both carry visual weight, and the curve makes the silhouette look deliberate. On a flat top there's nothing to frame.
Straight, fine hair leans mid fade. It shows every line clearly, and a level fade is easier to execute perfectly on it. A slightly uneven arc is far more noticeable on straight hair than on curly.
For face shape, a drop generally flatters round, oval and square faces by adding length and contour. On a long face, height matters more than shape, so go lower with either version.
One direction is easier than the other
Dropping a level mid fade into a drop takes growing the back out a little first. The drop needs length at the nape that a level mid fade has already cut away, so your barber can't add it from nothing on the spot.
Going the other way is instant. Flattening a drop back into a level mid fade is just cutting the retained length at the back down to match, done in a single visit.
If you're torn and your barber cuts drops well, start with the drop. Flattening it is one visit, while adding it later means waiting on growth. If you don't trust your barber with the arc yet, start with the mid fade and accept the wait.
Mid drop fade vs mid fade: which should you get?
Choose the mid drop fade if: you keep some length or texture on top, you like a strong side and back profile, the back of your head is flatter, and you have a barber who cuts drops regularly.
Choose the mid fade if: your top is very short, your hair is fine or straight, you want the most forgiving option to execute and maintain, or you're at a new barber and don't know their work yet.
Still deciding? Try the fade finder quiz.
How to ask for each
| Goal | What to say |
|---|---|
| Mid drop fade | "Mid drop fade, a #1 into a #3. Start at mid-temple, and let the line drop down behind my ear to the nape rather than staying level." |
| Standard mid fade | "Mid fade, #1 into a #3. Keep the line level the whole way round, no drop at the back." |
| Checking your barber's experience | "Do you cut many drop fades? Can I see a photo of one you've done?" |
Frequently
asked
What's the main difference between a mid drop fade and a mid fade?
Why do they look so similar in photos?
Which is harder for a barber to cut?
Is a drop fade worth it with a buzz cut on top?
Does the drop remove more hair?
Can a barber turn a mid fade into a drop later?
Which needs more maintenance?
Which suits curly hair better?
More fade comparisons
Mid drop vs low drop fade, vs mid taper fade, vs skin fade, or the full mid drop fade guide.
Fade Line is an independent grooming resource, not a barbershop. Advice here is general, and results vary by hair type and barber. Updated October 2026.